.png)
I have been working on several web projects recently where I needed to secure an application running on IIS to provide an encrypted connection to the website. I detailed the process for purchasing a wildcard certificate here. Now I want to demonstrate how to install that certificate to secure your website.
My example is running IIS on Windows Server 2016 Standard. For this instance, I purchased a wildcard certificate (*.sps-k12.com) so I have a star_sps-k12_com.pfx that needs to be copied somewhere locally on my server. I’ll copy it to c:\tools\.
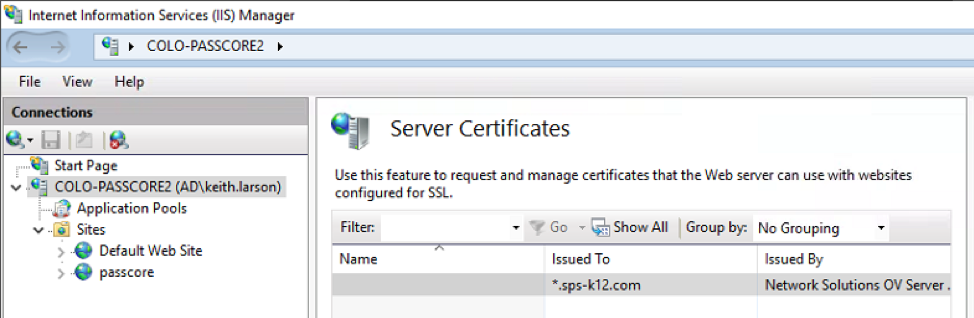
Navigate to “Administrative Tools” and run “Internet Information Services (IIS) Manager”. Select your servername and open “Server Certificates”.
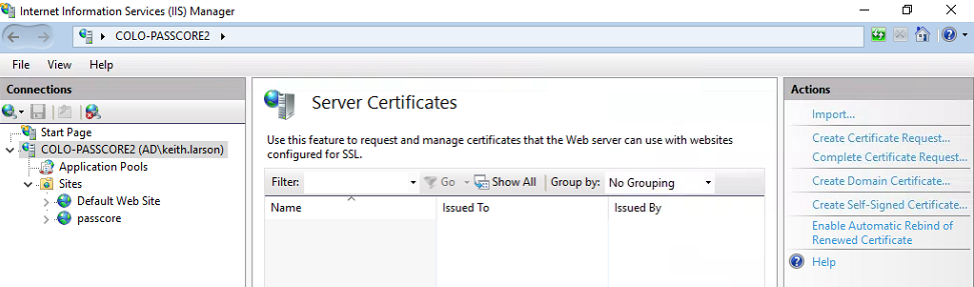
Select the “Import” action to open the “Import Certificate” wizard. Browse to your .PFX file. Enter the password that you assigned to your private key, leave the certificate store set to “Personal” and keep the “Allow this certificate to be exported” checked. If the certificate imports properly, it will appear in the list of certificates like this:
Now we need to make some adjustments to the bindings on the website to take advantage of the new certificate. The example that I’m using was an instance of PassCore, the open source project for password self-service for Active Directory. See more information about this project here.
When you install IIS, you automatically get a “Default Web Site”, but this isn’t what we want to use. I have not been able to find a way to disable or delete this, so I simply change the binding on this to use port 81, so that it is out of the way for my production application to use 80 and 443. To do this, right-click on “Default Web Site” and select “Bindings”.
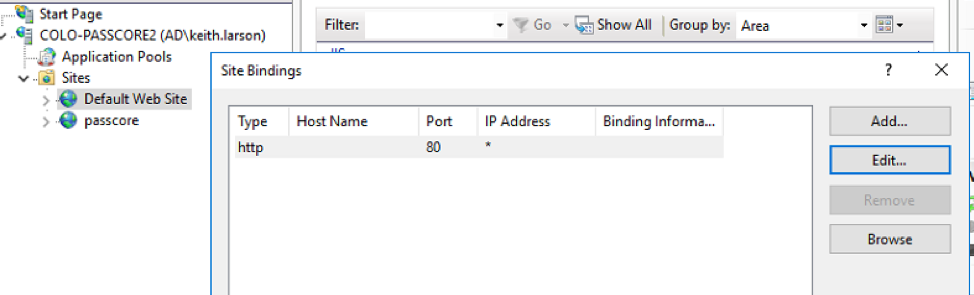
Then click on “Edit”, change the port from 80 to 81. Click OK and Close to save these settings.
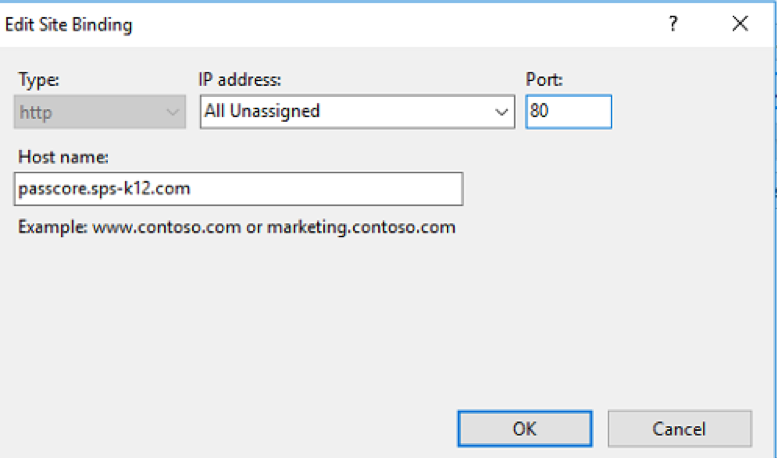
Next, right-click on “PassCore” or your production application and select “Bindings”. If you use the PowerShell installation script for PassCore, it defaults to port 8080. Select the http binding and click “Edit”. Change the port to 80 and enter the hostname that you intend to use. In my case, I am using passcore.sps-k12.com.
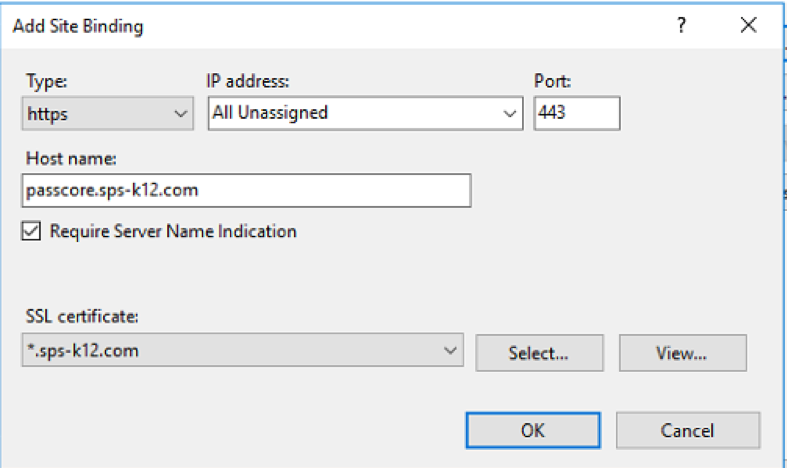
Now we want to add a binding for https. Under “Site Bindings”, click “Add”. Select the type of “https”, verify that the port is 443. Enter the same hostname as the http binding (passcore.sps-k12.com for my server). Check the “Require Server Name Indication” checkbox. Under the “SSL Certificate” drop down you should see your newly installed certificate, select it and click “OK” to save the settings.
Now you can close your “Site Bindings” dialog. Select your server and under “Manage Server”, click “Stop” and then “Start” to activate all of the new settings.
Next, it is important that you have a dns entry that resolves the hostname that you used for the website binding to the ip address of this server. To test that, open a browser and type https: and your hostname. For my example that would be https://passcore.sps-k2.com. Here are the results that I get:
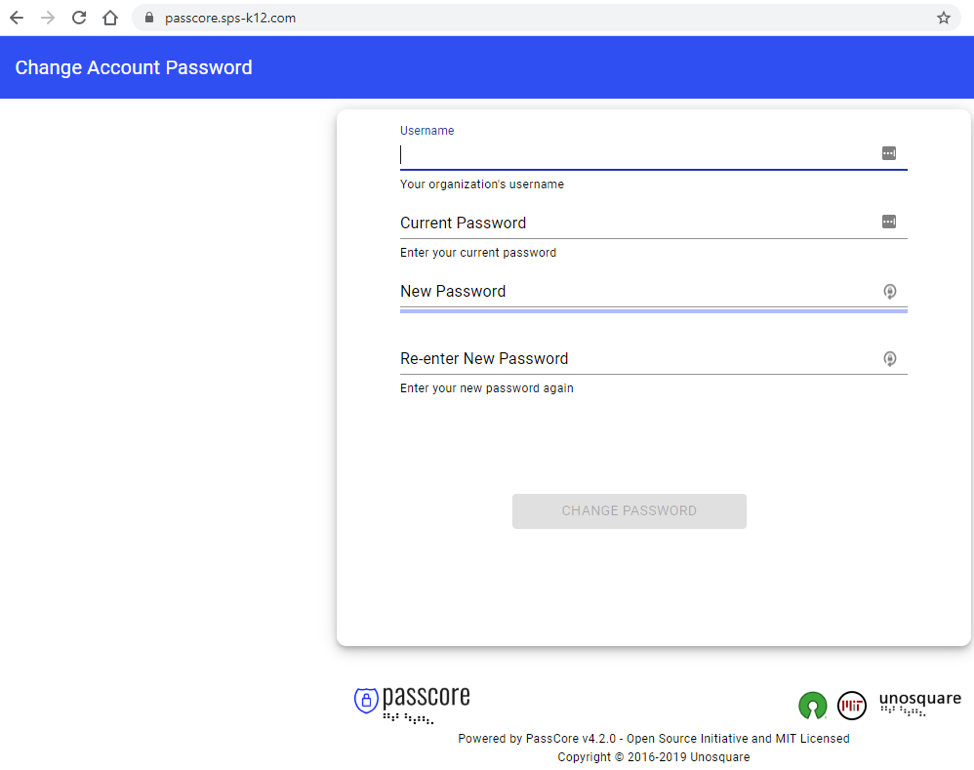
You can see that I get a closed lock displayed in front of the URL showing that the session is secured. You can right-click on the lock and see the details of the certificate and see that it is indeed valid. Now you can be assured that the connection to this website is encrypted and therefore more safe for operations like managing passwords. Again, if you need the details on the process for purchasing a wildcard certificate click here.
If you require assistance with this process, please click below to inquire about our consulting services.
Would you like to automate provisioning for your district?

About Student Provisioning Services
SPS completely automates the creation and maintenance of student accounts in your Active Directory or e-Directory to save you time and help ensure accuracy. Most districts then have their local directory synchronized with Google Apps for Education or G-Suite, so they are immediately created in Google as well. Learn more.
You may benefit from reviewing our article: How to Sync Groups to Active Directory.
Check out our latest case study here.


.svg "SPS K-12 Logo White")