.png)
There are lots of reasons that Google Apps for Education has caught on and been adopted by so many school districts. One of them is the idea that if we can share and collaborate on everything in the cloud, then we can avoid printing so much paper. My experience is that everyone thinks that they will no longer need to print, but they find later that it isn’t completely true. So then, we must have a solution for managing this in a way that is sensible.
Google offers a solution with their “Google Cloud Print Service” that is available here:
https://tools.google.com/dlpage/cloudprintservice
This can be installed on a Windows server that is serving printers to windows workstations and turn any and all of these printers into Google Cloud printers that can be shared with users and printed to from Chrome devices, even from mobile phones.
There has been a lot of chatter recently one the Technology Coordinator Listserv hosted by the Ohio Department of Education about issues with the Google Cloud Print Service. From trouble with browser versions to IT personnel having to delete and reinstall printers every few days, Google Print has presented many challenges. You can view the thread here if you are a member.
Looking to take the hassle out of Student Provisioning?

This discussion has encouraged me to look deeper into how to make this work well for a school district. I discovered my own challenge with the Google solution. All print jobs that are printed in this way, show the owner of the job as the user that was used to install and run the service on the windows server. On a very small scale, this might be acceptable, but it really isn’t when you make this available on a broader scale. There are always a small percentage of users that print a disproportionate amount of paper. There are a number of printing accounting solutions, but the defacto standard is PaperCut. As it turns out, they have their own solution to Google Cloud Print that works very well.
Note: Do not enable Google Cloud Print Service and PaperCut Google cloud printing on the same print server. It will duplicate every printer and you will not be able to tell the PaperCut one from the Google Cloud Print one. It can be very confusing like this example:
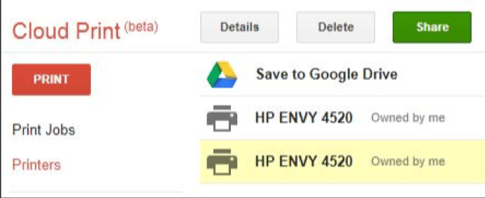
The simple solution is to just uninstall the Google version and use the PaperCut version. PaperCut is a licensed product that does have a cost associated with it where the Google version is free.
Before we get into how to do this with PaperCut, it is important that another foundation be laid first. The most effective and simple way to share printers is with a Google group. We wrote up how to sync your AD groups with Google here, but there is an additional requirement for this to work well with printers. You must define an owner to the Google group. I typically recommend defining the managedBy attribute in AD and then configure GCDS to map this to the group owner in the group sync configuration.
The owner is important because when this is defined, this person can accept the shared printer on behalf of the entire group and it is automatically made available to all members of the group. This is especially important for students so that they don’t each have to accept the sharing individually.
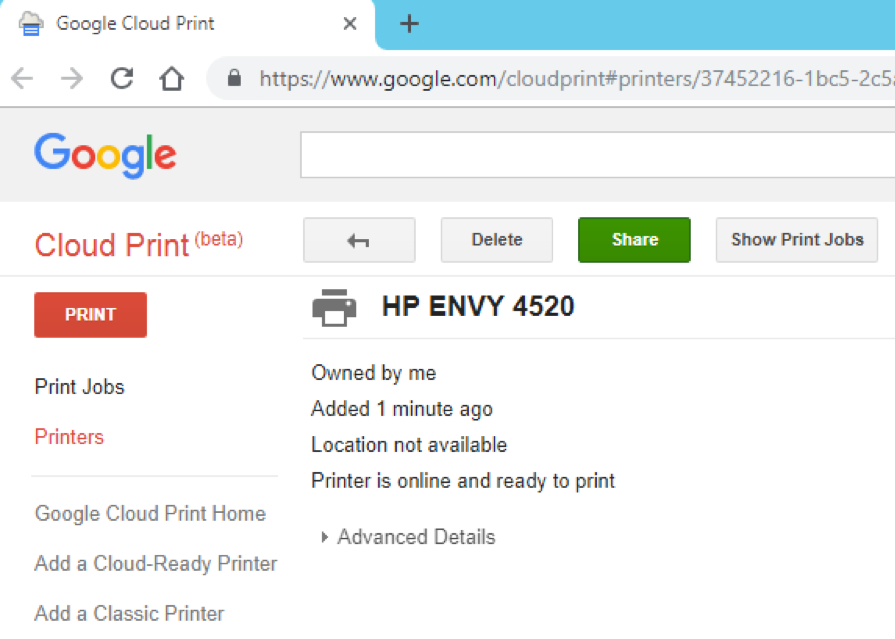
This notification doesn’t come to the user as an email though. They must login to their Google account and navigate to Cloud Printing. You can use the url https://www.google.com/cloudprint
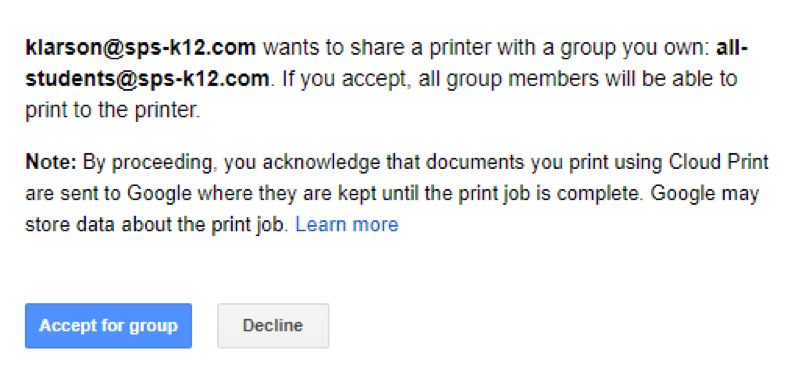
Then you will receive a notification like this one where I have shared a printer with a group named all-students.
Now, to take a few steps back and detail how we set up printing to get to the point where we can share it with a group that is already configured properly.
Start with a free trial download of PaperCut NG here: https://www.papercut.com/products/ng/download/
The installation is rather simple, so I won’t detail every step here. For my test, I installed the application on my Windows Server with the Print Services role added. Login to the admin console using http://localhost:9191/admin and use the default credentials provided from the documentation.
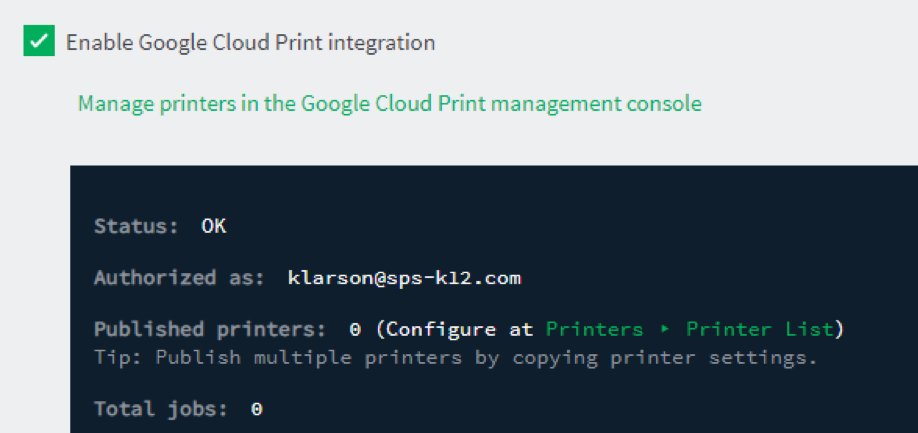
Navigate to Options/”Mobile & BYOD” and scroll down to Google Cloud Print. You must check the box to “Enable Google Cloud print integration” and then provide OAuth credentials to manage printing within your Google Apps domain. When finished, it should look something like this:
Navigate to Printers/”Printer List” and select the printer that you want to be cloud print enabled.
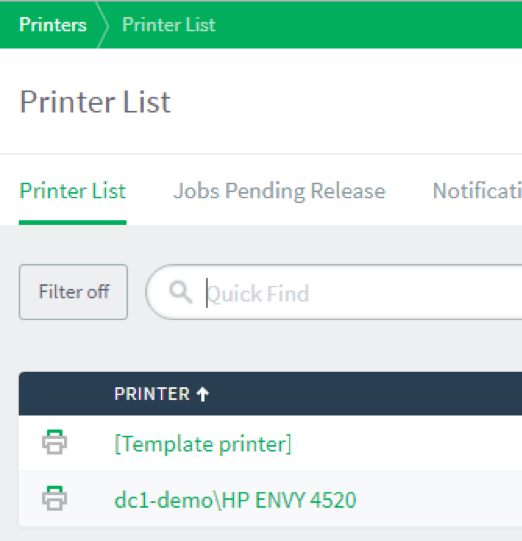
Scroll down and click the button “Publish to Google CloudPrint”. Once it has been published, select the “Manage sharing in Google Cloud Print” link.

This will take you directly to the printer that you just enabled and allow you to configure sharing.
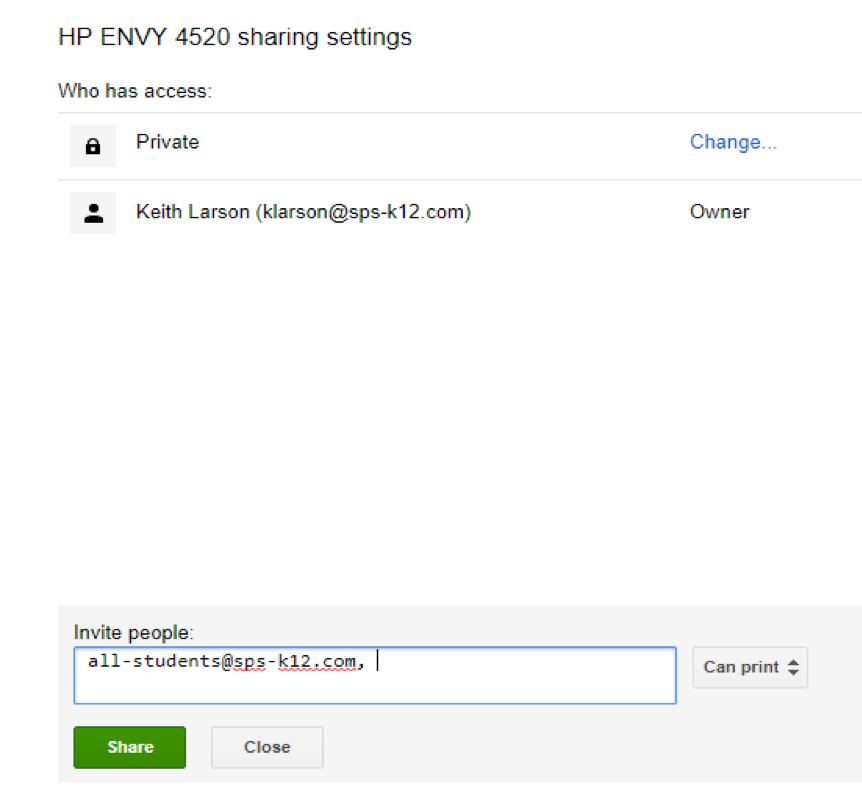
Click on the “Share” button. You will be presented with a list of users that the printer is currently shared with. In the “Invite people” window, enter the email address of the Google Group that you want to share the printer with, make sure that “Can print” is selected and click “Share”.
You may see an error initially.

Close the window and click on Share again. You should see the group listed with “Can Print” as an option, like here:

Now, the final task is to login as the owner of the group and accept the sharing request on behalf of all the members of this group. Then this printer will appear as a choice any time any member of that group logs into Chrome.
Please share this article using the buttons below if you found it useful.


.jpg?width=900&name=My%20Post%20(4).jpg)
.svg "SPS K-12 Logo White")